Showing posts with label tutorial. Show all posts

3.02.2013

St. Patty's Day GIVEAWAY!

St. Patty's day is just around the corner! & in other wonderful news: my FaceBook Fan Page is at 101 fans! Wooo! I decided since this is the first milestone of many, I would do a giveaway! Have you seen my YouTube video on the giveaway? If not, make sure you go check it out! It's a St. Patty's Day tutorial & you can get a sneak peek of some of the prizes in action!


Now for the rules!
RULE #1: NO CHEATING! Have fun & be friendly.
RULE #2: SHARE SHARE SHARE! It's not necessary but it's nice to do so & you earn extra entries!

Happy giveaway!
Winner will be drawn March 10th & prizes mailed March 11th. (:


a Rafflecopter giveaway

2.14.2013

Valentine's Day Nail Tutorial

FOREWARNING: This post is heavily picture ladened. You have been warned.

Happy iheartyou day, everyone! I hope your loved one has treated you well & if you're single, I hope you treated yourself well today! No need to be sad on this "day of love" when you can be your own Valentine & spoil yourself rotten & make yourself feel beautiful with something as simple as a fun mani using drug store nail polish! What's that mean for you? Cheap beauty! Here's our arsenal:
 NYC #111 in Fuschia Shock Creme
Sinful Colors #101 in Snow Me White
Wet'n'Wild Wild Shine #424A in Black Creme
NYC Matte Me Crazy top coat
Small nail design brush {side note: I actually went to Walmart & in the arts & crafts section I pick up a 5 pack on brushes designed for miniature doll house painting. Works wonderful although the brushes are a little stiff}

First things first, make sure your nails are prepped, clean & ready to go! If not, remove any excess polish, clip, flip, whatever! The apply 2 coats of Sinful Colors "Snow Me White" to you thumb, middle, & pinky fingers.
 While the white is drying, take Wet'n'Wild's Wild Shine in "Black Creme" & apply two coats to your index & ring finger. This step is not neccessary if you use a thick coat but I like to apply thinner coats to get a nice even coating. Even one coat was good but I wanted to do 2 just to be safe.

 Now here comes the fun part! Take you thin nail art brush & the "Black Creme" again. Now we're going to draw the tic-tac-toe board on the thumb making x's in all the boxes except the 3 going diagonally.
 After we're done carefully placing our x's we're going to take NYC #111 in "Fuschia Shock Creme" & our small brush again. This time, we're going to draw a little heart in each empty square on our thumb as well as a big heart on them middle & pinky.


 & voila! Now the final step is optional, but I don't really like the look of high gloss black so I took NYC's "Matte Me Crazy" & did a nice coat on my index & ring finger to kind of offset the textures a bit.
See? Isn't that just the cutest little mani!? It's great if you're not too girly but still want to have a valentines day mani. What do you think? Would you rock it? If you do, show me pictures! Tag me on instagram: @JustaGirlx826 or hashtag me on twitter @JustaGirlx826 #vdayblogmani
xox.


1.11.2013

DIY: Vanity Project

So I got a request from one of my lovely fans, Allie, asking about my vanity when I told her it was repurposed from my oldest son's CRIB! Yes, CRIB! I found the idea on pinterest {Here's the original post: http://www.frugalcouponliving.com/2012/10/07/converted-old-crip-into-new-desk/ } & modified it to fit my needs. (: So when we were moving my vanity from the upstairs bedroom into my new makeup room downstairs {Watch my VLOG on the transformation here} I decided now was the PERFECT time to snappy snap some pictures & tell yah what's up! ^__^

This is going to be a heavily picture laddened post. You have been warned.

First things first, I needed to grab the pieces to the crib... just not the drop side part. So, the back, 2 sides, & the bed frame part... thing. Hah hah. Oh! & having some help of friends {in my case my hubby & our friend} is an AWESOME plus! You'll also need wood screws, a drill, & a drill bit.


Bed pieces assemble, hoooo!
{Who gets the reference? Please don't make me feel old, hah hah!}

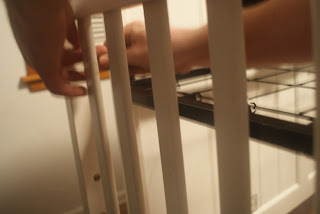
 Second, put the sides of the of the crib on at the back piece at the level they would be if you were putting together an actual crib. You may need to drill another hole if you're putting it at a level where there are no screw holes, kind of like we did.


 The boys hard at work, hah hah

 Then place the front braces on the crib OPPOSITE of the back piece.


 Even the munchkins helped!

After you get the structure done, it's time to add the bed frame part.


 & tada!


Munchkins not included.

 This picture was taken BEFORE I put on the wood plank top, but you can use anything as your topper. Hubby says he's going to build me a better customized top instead of the palette planks that I am using now. Yayyy! ♥

So you don't have to spend thousands of dollars on a dresser if you know how to build stuff! So go on, give DIY a try! I'd love to see your creations!

♥ & All Things Vintage: Becca